3-Peat Training
your may homework hub is live. 15 daily drills, 3 family drills, and per-day video instruction for the 3-peat phase. tap the gold button below to jump straight to today’s drill.
every drill follows the same 4-step submission flow — read, set up, record, upload. the submission guide is just below the calendar.
the calendar.
every day in may has a job. 8 camp days. 15 homework drills. 3 family drills (parent + athlete on the floor together — every sunday). tap any colored day to jump to that drill.
how to submit.
every drill follows the same 4 steps. read once, repeat all month. if you’re stuck on any step, text coach.
Read & Watch
Read the drill instructions and watch the daily homework video. Know the cues before you film a single rep.
Set Up Tripod
Set up a tripod and place your phone on it. Steady wide shot — coach needs to see your whole body in frame.
Record the Drill
Record only the video that is requested in the homework submission. No extras, no edits — just the drill.
Upload to Drive
Once the video is complete, upload it to your athlete’s Google Drive folder (shared by ATLAS Hoops). Drop it in the matching HW## subfolder.
the work.
Tap any drill to expand. Mark complete when you’ve uploaded your video. Your progress saves on this device.
01Paxson: 2-Foot Rotation Balance Shooting
Paxson: 2-Foot Rotation Balance Shooting
2-Foot Rotation
Balance Shooting Drill
“15 makes left, 15 makes right. find your shot pocket.”
▶ Coach demo · 2-Foot Rotation Balance Shooting Drill
Feet under hips, chest slightly down, ball in the pocket.
If your base is wrong, the shot is wrong.
Every rep starts with a body check.
Your shoulders and hips are like headlights.
They should “shine” toward the back of the rim — square to the hoop on every shot.
This rule shows up in every drill this month. Lock it in now.
📍 Headlights face the back of the rim · click to enlarge
The Drill
Stationary Position Check
Reference: starting position · click to enlarge
- Basketball in shooting pocket (at belly button)
- Shooting hand wrist loaded — pulled back
- Shoulders stacked over the basketball
- Butt back, chest SLIGHTLY down
- Feet under your hips
- Weight on the balls of your feet
Hop 90° LEFT
Keeping everything in the position from Step 1, hop off two feet at a 90° turn to your LEFT. Position locked, body rotates as one piece.
Land — Jump Stop
Land on both feet at exactly the same time. This is your jump stop. Hold the landing — no extra hop, no shuffle. Your foundation for everything that comes next.
Hop & Square Up
Quickly hop off both feet and face (square) up to the hoop. Shoulders, hips, and feet all aligned to the rim before the next phase.
PULL — Pocket to Set Point
As your feet land, the basketball is PULLED from your shooting pocket (belly button) up to your shoulder. That shoulder position is your set point.
PUSH — Set Point Through Release
From the set point, the basketball is PUSHED from your shoulder, up through a straightened elbow, into a flexed wrist (fingers down), and rolls off the fingertips — pointer or middle finger.
Switch Sides
After making 15 shots from the LEFT, rotate to the RIGHT side and shoot 15 from there. Same drill, opposite direction.
What NOT to Do
Reference: common errors · click to enlarge
- Chest dropped too far — pulls the ball out of the pocket and breaks your balance.
- Chest pushed up — disrupts the wrist load and changes the release angle.
- Eyes down on the ball — you can’t read the rim if you’re looking at your hands.
- Feet land separately — kills the jump stop and turns the rotation into a fade.
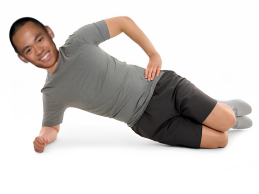
Forward Planks
Hold a forward plank — straight line from head to heels, elbows under shoulders, glutes squeezed, no hip sag.
This builds the core that holds your shooting base steady.
You do NOT need to perform all of these planks, please choose one version of the forward planks
Balance Fundamentals
2-Foot Rotation Balance Passing Drill
No hoop? No problem. Same footwork — pass to a wall or partner instead of shooting.
- Reps: 15 Makes — L>R Foot Back, R>L Foot Back
- Location: L Elbow & R Elbow (or any two spots ~6 ft apart)
- Key: The receiver replaces the rim. Same 2-foot hop, same square-up, same pull-and-push mechanics.
▶ Coach demo · Small-space substitute
🏆 Points BreakdownView
How to Earn 55 points
📤 Submission
✅ Completion
🎯 Accuracy (Coach Graded)
📤 Submit This DrillView
4 Steps. Done.
- Open your assigned May Drive folder (bookmarked link from coach).
- Find the HW01_050526 subfolder inside.
- Drop your video in. Name it:
FirstName_HW01.mp4 - You’re done. Coach grades by Sunday.
Tap when you’ve uploaded your video. Saves to this device.
✓ Completed — great work, athlete
02Hopson: Roll Out Step-To Shooting
Hopson: Roll Out Step-To Shooting
Roll Out
Step-To Shooting
“ceiling above your head. stay low. attack the ball.”
▶ Coach demo · Roll Out Step-To Shooting
Imagine a ceiling 1 foot above your head.
If you stand up while you grab the ball, your head hits the ceiling.
Stay LOW — attack the ball, don’t rise to it.
The Drill
Lunge Stance
Start in a lunge position — LEFT foot in front of RIGHT foot for the first rotation. Knees bent, chest stable, weight loaded. Ball in your hands, ready to roll.
Roll the Ball Out
Holding your lunge, roll the basketball out from yourself with your shooting hand. Keep your shooting elbow tucked tight against your hip the whole time — do not let it drift away from your body.
Wrist Loaded BEFORE the Catch
Quickly close the distance to the ball. Your shooting hand should already be in the wrist-loaded position (pulled back, ready to fire) BEFORE you touch the ball — not after. The ball goes straight into your shooting pocket.
Aggressive LEFT Step
Reach and take a small but aggressive step with your LEFT foot. The keyword is small — no big lunges. Stay compact. Stay low. Remember the ceiling 1 foot above your head.
Hip Drop & Square Up
As your LEFT foot hits the ground, drop your hips. Pull the ball from your shooting pocket up to your set point (about shoulder or chin height). Your RIGHT foot lands underneath, squaring hips and shoulders to the rim. One smooth motion: land, drop, pull, square.
Push to Back of Rim
From the set point, push the ball through the air. Flick your wrist. Aim for the BACK of the rim — soft touch, perfect arc. Hold the follow-through until the ball hits net or rim.
Switch Foot Lead
After 15 makes with LEFT foot leading, switch to RIGHT foot leading. Same drill mechanics, opposite footwork. R-handed shooters score points on the R-leads. L-handed shooters score on the L-leads.
What NOT to Do
- Standing up as you grab the ball — biggest mistake. Your head hits the ceiling. Stay low the whole time.
- Shooting elbow drifting from your hip on the roll-out — keep it tucked tight until the catch.
- Catching the ball with the wrist NOT loaded — load happens before the catch, not after.
- Big lunging steps instead of small aggressive ones — small steps preserve balance and speed.
- Adding extra steps after the step-to — it should be exactly two foot strikes (lead foot, then under foot), then the shot.
Side Planks (from knees)
Drop to your knees on one side. Stack your top knee on the bottom knee, prop yourself up on your forearm, and lift your hips so your body forms a straight line from head to bottom knee. Hold for 30 seconds. Switch sides. This builds the lateral core strength you need for the step-to landing.
Step-To Fundamentals
Step-To Pump Fake
No hoop? No problem. Same step-to footwork — but pump fake instead of shoot.
- Reps: 20 reps each side — L > R Foot Back > Pump Fake; R > L Foot Back > Pump Fake
- Location: L Elbow & R Elbow (or any two spots ~6 ft apart)
- Key: Same lunge → wrist load → step-to mechanics. Pump fake replaces the shot. No hoop needed.
🏆 Points BreakdownView
How to Earn 74 points
📤 Submission
✅ Completion
🎯 Accuracy (Coach Graded)
📤 Submit This DrillView
4 Steps. Done.
- Open your assigned May Drive folder (bookmarked link from coach).
- Find the HW02_050726 subfolder inside.
- Drop your video in. Name it:
FirstName_HW02.mp4 - You’re done. Coach grades by Tuesday.
Tap when you’ve uploaded your video. Saves to this device.
✓ Completed — great work, athlete
03Harper: 2-Foot Rotation Balance, Pump Fake + Shooting
Harper: 2-Foot Rotation Balance, Pump Fake + Shooting
2-Foot Rotation
Pump-Fake Shooting
“stay low. pump the fake. then shoot.”
▶ Coach demo · 2-Foot Rotation Pump-Fake Shooting
Imagine a ceiling 1 foot above your head.
If you stand up while you grab the ball, your head hits the ceiling.
Stay LOW through the catch — sell the pump fake — then rise into the shot.
The Drill
Toss & Roll to Self
Toss or roll the basketball forward to yourself. Stay low as you move toward it — the ceiling is right above your head. Don’t rise to chase the ball.
Catch in Shooting Position
Reference: catch position · click to enlarge
- Basketball in shooting pocket (at belly button)
- Shooting hand wrist loaded — pulled back
- Shoulders stacked over the basketball
- Butt back, chest SLIGHTLY down
- Feet under your hips
- Weight on the balls of your feet
Land — Jump Stop
Land on both feet at exactly the same time. This is your jump stop. Hold the landing — no extra hop, no shuffle. Your foundation for everything that comes next.
Hop & Square Up
Quickly hop off both feet and face (square) up to the hoop. Shoulders, hips, and feet all aligned to the rim before the next phase.
PUMP FAKE — Pocket to Eyebrow to Pocket
As your feet land, the basketball is PULLED from your shooting pocket (belly button) UP to your eyebrow — full pump fake — and then back DOWN to your shooting pocket. Sell the fake. Half-hearted pumps don’t move defenders.
SHOOT — Pocket to Set Point to Release
From the shooting pocket, the basketball is PULLED up to your set point (shoulder or chin), then PUSHED through a straightened elbow into a flexed wrist (fingers down) and rolls off the fingertips — pointer or middle finger. Hold the follow-through.
Switch Sides
After making 15 shots rotating to the LEFT, switch and rotate to the RIGHT for 15 more. Same drill, opposite direction. Pump fake every rep.
What NOT to Do
- Standing up as you grab the ball — your head hits the ceiling. Stay low through the catch.
- Half-pumping the fake — if it doesn’t go to your eyebrow, it doesn’t sell. Defenders won’t bite.
- Catching with the wrist NOT loaded — load happens before the catch, not after.
- Adding extra dribbles or steps after the pump — pump goes pocket to eyebrow to pocket, then straight into the shot.
- Feet landing separately — kills the jump stop and breaks the rotation rhythm.
Forward Planks
Hold a forward plank — straight line from head to heels, elbows under shoulders, glutes squeezed, no hip sag.
This builds the core that holds your shooting base steady through the pump fake.
Pump-Fake Fundamentals
2-Foot Rotation Balance Pump-Fake Jab Drill
No hoop? No problem. Same rotation footwork — pump fake into a jab step instead of a shot.
- Reps: 15 reps each side — L Rotation > Pump > Jab; R Rotation > Pump > Jab
- Location: L Elbow & R Elbow (or any two spots ~6 ft apart)
- Key: Same 2-foot hop, same square-up, same pump-to-eyebrow. Jab step replaces the shot. Sell the fake every rep.
▶ Coach demo · Small-space substitute
🏆 Points BreakdownView
How to Earn 69 points
📤 Submission
✅ Completion
🎯 Accuracy (Coach Graded)
📤 Submit This DrillView
4 Steps. Done.
- Open your assigned May Drive folder (bookmarked link from coach).
- Find the HW03_050826 subfolder inside.
- Drop your video in. Name it:
FirstName_HW03.mp4 - You’re done. Coach grades by Wednesday.
Tap when you’ve uploaded your video. Saves to this device.
✓ Completed — great work, athlete
04Kerr: Curl Step-To Shooting
Kerr: Curl Step-To Shooting
Curl
Step-To Shooting
“low on the curl. square to the rim. fire.”
▶ Coach demo · Curl Step-To Shooting
Imagine a ceiling 1 foot above your head.
If you stand up while you grab and rotate, your head hits the ceiling.
Stay LOW through the curl AND through the shot — never rise.
The Drill
Toss & Roll to Self
Toss or roll the basketball forward to yourself. Stay low as you move toward it — the ceiling is right above your head. Don’t rise to chase the ball.
Step Into Shooting Position
Reference: shooting position · click to enlarge
- Basketball in shooting pocket (at belly button)
- Shooting hand wrist loaded — pulled back
- Shoulders stacked over the basketball
- Butt back, chest SLIGHTLY down
- Feet under your hips
- Weight on the balls of your feet
Catch Off LEFT · Turn Off RIGHT
Catch the basketball off your LEFT foot. Then turn your body to face the hoop off your RIGHT foot. The LEFT foot plants — the RIGHT foot rotates. One smooth curl, no extra steps. This is when the Headlights Rule from HW01 matters most — as you finish the turn, your shoulders and hips should “shine” toward the back of the rim. Not angled past it. Not short of it.
📍 Headlights face the rim — see HW01 · click to enlarge
Elbow Tucked, Wrist Loaded ON the Catch
When catching the ball, keep your shooting elbow tucked tight at your hip and your wrist already loaded (pulled back). Load happens before the catch — not after. The ball arrives into a ready hand, not a hand still getting ready.
Hand Behind the Ball — Pull to Pocket
Your shooting hand should be behind the ball as you pull it down into your shooting pocket (belly button). The off-hand stays on the side as a guide — never on top, never in front.
RIGHT Foot Lands — Pull to Set Point
As your RIGHT foot hits the ground under your hips, your body is now squared to the rim. Pull the ball from your shooting pocket up to your set point (about shoulder or chin height). Smooth motion: land, square, pull.
Push to Back of Rim & Switch Sides
Once at your set point, push the ball through the air and flick your wrist toward the back of the rim. Hold the follow-through until the ball hits net or rim. After 15 makes leading with LEFT foot, switch to RIGHT foot leading first, LEFT foot under. Same drill, opposite footwork.
What NOT to Do
- Standing up as you grab and rotate — biggest mistake. Ceiling above your head applies through the catch AND the curl AND the shot.
- Catching with the wrist NOT loaded — load happens before the ball arrives, not after.
- Shooting elbow drifting from your hip on the catch — keep it tucked tight until you pull to the pocket.
- Body not squared at the shot — your right foot landing should finish the rotation. If you’re still turning when you shoot, you’re late.
- Big lunging steps instead of small aggressive ones — small steps preserve balance and speed.
- Adding extra steps after the catch — exactly two foot strikes (left, then right), then the shot.
Side Planks (from knees)
Drop to your knees on one side. Stack your top knee on the bottom knee, prop yourself up on your forearm, and lift your hips so your body forms a straight line from head to bottom knee. Hold for 30 seconds. Switch sides. This builds the lateral core strength you need for the curl footwork.
Curl Fundamentals
Step-To Rotation > Pump-Fake Drill
No hoop? No problem. Same curl-and-square mechanics — pump fake into a jab step instead of shooting.
- Reps: 20 reps each side — L > R Foot > Pump > Jab; R > L Foot > Pump > Jab
- Location: L Elbow & R Elbow (or any two spots ~6 ft apart)
- Key: Same curl footwork, same square-up. Pump fake replaces the shot. Sell the fake every rep.
🏆 Points BreakdownView
How to Earn 71 points
📤 Submission
✅ Completion
🎯 Accuracy (Coach Graded)
📤 Submit This DrillView
4 Steps. Done.
- Open your assigned May Drive folder (bookmarked link from coach).
- Find the HW04_050926 subfolder inside.
- Drop your video in. Name it:
FirstName_HW04.mp4 - You’re done. Coach grades by Thursday.
Tap when you’ve uploaded your video. Saves to this device.
✓ Completed — great work, athlete
05Beat the Lakers: Family Relay Race 1
Beat the Lakers: Family Relay Race 1
Beat
The Lakers!
“two cones. one timer. one winner per family.”
▶ Family demo · Beat the Lakers Relay Race
One parent on the floor. One athlete. No subs.
If the parent skips a rep, the family skips the rep.
Don’t worry about messing up — finish all 20 reps per microdrill. The fastest CLEAN run wins.
Setup
Pick One Parent
Pick one parent to participate in this drill with you. Older sibling can sub in if no parent available — but only one adult/older partner per family per attempt.
Set Up the Camera + Timer
Set up your phone on a tripod (or lean it on something stable) so the camera sees both players, the cones, and the timer. Start a stopwatch in front of the camera — the timer must be visible at the start of the race AND at the finish so coach can verify time.
Place the Cones
Grab two cones (or any markers — water bottles, shoes, books). Set them 10 feet apart. Athlete starts at cone A. Parent stands at cone B. The space between is your race lane.
Run the Race
When ready, hit the timer and run all 4 microdrills back-to-back as fast as you can. Timer runs continuously. One ball, one continuous take, no edits.
The Microdrills
Weak Hand Dribbles · Wide Stance
Athlete drops into a wide stance — feet wider than shoulders, knees bent, butt back. Dribbles the ball with the weak hand only. Count out loud: 20 dribbles.
Weak Hand Bounce Pass · 10 Feet
From cone to cone (10 feet apart), athlete and parent bounce pass with the LEFT hand only. 20 total passes — 10 from athlete, 10 from parent. One bounce per pass, chest-height arrival.
Weak Hand Dribbles · Lunge Stance
Athlete drops into a lunge position — one leg forward, knee bent at 90°, back leg extended. Hold the lunge while dribbling 20 reps with the weak hand only. Count out loud.
Ball Knee Circles → Bounce Pass
Athlete circles the ball around both knees (1 full lap = 1 rep), then bounce passes to the parent. Parent bounces it back. Repeat for 20 total reps. Ball stays low — knees bent the whole time.
Family with the fastest CLEAN time wins.
You’re racing every other family that submits this week.
1st = +25 pts · 2nd = +15 · 3rd = +10 · Participation = +5 for every family that finishes a clean run.
🔥 BONUS — Beat Coach KJ & Julian’s record time, earn +15 additional points. The record is in the demo video.
Race Penalties
- Dribbling with your STRONG hand — automatic −5 penalty per offense. Weak hand only on dribble drills.
- Skipping reps — finish the full 20 per microdrill. Coach counts on camera. Short reps = re-do.
- Stopping or editing the timer — one continuous take, timer visible start to finish.
- Subbing partners mid-race — same parent + same athlete the whole way through.
Have Fun. Finish Strong.
Don’t worry about messing up — finish the 20 reps for each microdrill. Family drills are about the time you spend on the floor together. The race is the excuse, the reps are the work, the laughs are the point. Have fun.
🏆 Points BreakdownView
How to Earn 45 points
📤 Submission
🏁 Completion (Race Placement)
🔥 Bonus — Beat the Coaches
⚠ Penalties
📤 Submit This DrillView
4 Steps. Done.
- Open your assigned May Drive folder (bookmarked link from coach).
- Find the HW05_051026 subfolder inside.
- Drop your video in. Name it:
FamilyName_HW05.mp4 - You’re done. Coach ranks all family times by Wednesday night.
Tap when you’ve uploaded your family video. Saves to this device.
✓ Family drill complete — well done
06The Worm: Stationary Low Rips + Curl Shooting
The Worm: Stationary Low Rips + Curl Shooting
Stationary Low Rips
+ Curl Shooting
“rip tight. through the knees. then fire.”
▶ Main demo · Stationary Rips · then carry over to curl shooting
One hip. Through the knees. To the opposite hip.
The ball never goes around your body — it cuts UNDER you.
Stay low. Feet planted. Aggressive every rep.
The Drill
Roll the Ball to Yourself
Roll the basketball forward to yourself. Stay low as you move toward it. The ceiling rule applies the moment you touch the ball.
Catch on the Jump Stop
Catch the basketball on a jump stop — both feet hit the ground simultaneously. This is your stationary base for the rips. Feet shouldn’t move again until all 30 reps at that height are done.
Ball to ONE Hip
Pull the basketball into your LEFT hip or RIGHT hip — pick a side, start there. Athletic stance: chest slightly down, knees bent, weight on the balls of your feet. Wrist already loaded.
The Rip — Half-Circle Path
In the shape of a half-circle, rip the ball from ONE HIP, UNDER YOUR KNEES, to the OPPOSITE HIP. The ball cuts UNDER the body — never around it, never up over the chest. One smooth aggressive motion.
Three Heights — 30 Reps Each
Perform 30 rips at LOW height (under the knees), then 30 at MID height (waist level), then 30 at HIGH height (chest level). Same half-circle path at each. Feet do not move between heights — only the rip height changes.
Stay LOW on the Highs
The biggest mistake on high rips is standing up. Your hands rise, but your hips and chest must stay where they were on the low rips. Ceiling 1 foot above your head — if you stand, your head hits it.
Curl Shoot — 10 Makes (HW04 Footwork)
After the rips, transition straight into 10 curl shots using the footwork from HW04. R-handed shooters: R Foot > L Foot > Shot. L-handed shooters: L Foot > R Foot > Shot. Apply the Headlights Rule — shoulders and hips square as your second foot lands. Hold the follow-through.
What NOT to Do
- Standing up on the high rips — biggest mistake. Hands go up, body stays down.
- Feet moving during rips — your base is locked. Once the jump stop is set, feet don’t shift until all 30 are done.
- Half-circle becomes a straight line — the ball MUST go UNDER the knees. A straight rip across the body teaches nothing.
- Soft rips — aggressive every rep. If a defender wouldn’t react, it’s too slow.
- Sloppy curl after the rips — fatigue is not an excuse. The curl footwork stays clean even after 90 rips.
Rear Foot Elevated Split Squat
Also known as the Bulgarian split squat. Back foot elevated on a bench, chair, or couch. Front foot far enough out that your front knee tracks over (not past) your toes. Lower your back knee toward the ground, drive through your front heel to stand back up. This builds the single-leg power your shooting footwork lives on.
▶ Demo · Rear Foot Elevated Split Squat
Rip Fundamentals
🏆 Points BreakdownView
How to Earn 89 points
📤 Submission
✅ Completion
🎯 Accuracy (Coach Graded)
📤 Submit This DrillView
4 Steps. Done.
- Open your assigned May Drive folder (bookmarked link from coach).
- Find the HW06_051226 subfolder inside.
- Drop your video in. Name it:
FirstName_HW06.mp4 - You’re done. Coach grades by Saturday.
Tap when you’ve uploaded your video. Saves to this device.
✓ Completed — great work, athlete
07Pip: Stationary Jab + Rip Series + FTs
Pip: Stationary Jab + Rip Series + FTs
Stationary Jab + Rip
Series + Free Throws
“stay low. jab. rip. then drain 20 from the line.”
▶ Coach demo · Stationary Jab + Rip Series
This is the foundation drill for the jab series.
Stationary today. Pull-up tomorrow (HW08). One-dribble pull-up the day after (HW09).
Master the jab + rip clean here, the next two drills build on it.
📍 Floor setup — R Elbow + FT Line · click to enlarge
The Drill
Roll Ball to Self at R Elbow
Position yourself at the RIGHT elbow of the FT line. Roll the basketball forward to yourself. Stay low as you move toward it — ceiling rule applies the moment you touch the ball.
Catch on the Jump Stop
Catch the basketball on a jump stop — both feet hit the ground simultaneously. This is your stationary base. Feet shouldn’t move until all 20 jabs are complete.
Ball to LEFT or RIGHT Hip → Triple Threat
Pull the basketball into either your LEFT hip or RIGHT hip — pick a side, start there. Drop into triple threat — knees bent, chest slightly down, eyes up, ready to shoot/pass/dribble. This is the position every jab launches from.
The Jab Series — Small + Long Jab
From triple threat: small jab (toe tap) first — quick, controlled, sells the defender. Reset. Then long jab — bigger commit, more aggressive. Pivot foot stays planted on both. Chest stays down through the series.
Rip — Three Heights, Cycle Through
After the jabs, rip the ball cycling through three heights: 4A. LOW rip (under the knees) · 4B. MID rip (waist) · 4C. HIGH rip (chest). Same half-circle path from HW06 — hip, through the knees on low, to the opposite hip. 20 jab-rip reps total, mixing the heights aggressively.
Stay LOW on the High Rips
The biggest mistake on HIGH rips is standing up. Hands rise but chest, hips, and knees stay where they were on the low rip. Ceiling 1 foot above your head — if you stand up, your head hits it.
Move to FT Line → Make 20
After the 20 jab-rip reps, walk to the FT line — 15 ft straight back from under the rim. Make 20 free throws. Same shooting mechanics from week 1 — feet under hips, chest slightly down, wrist loaded, hold the follow-through until the ball hits net or rim. This is a separate video from the jab series.
What NOT to Do
- Standing up on the high rips — biggest mistake. Hands rise, body stays low.
- Traveling during the jabs — pivot foot stays planted through small AND long jab. If it slides or lifts, that’s a travel.
- Small jab and long jab look the same — they shouldn’t. Toe tap fakes. Long commits. Two different speeds, two different distances.
- Rips become straight lines — every rip is a half-circle through the body, not a swipe across the chest.
- Rushing the FTs after the jab fatigue — pause, reset, breathe. Free throws are unguarded — earn each rep with a full routine.
Forward + Side Planks
This is the core conditioning that holds your jab discipline under fatigue. Forward plank after the LOW rip set. Side plank after the MID rip set. Forward plank after the HIGH rip set. One more round after you make 10 of your 20 free throws.
Jab Foundation Fundamentals
🏆 Points BreakdownView
How to Earn 103 points
📤 Submission
✅ Completion
🎯 Accuracy (Coach Graded)
📤 Submit This DrillView
Two Videos. One Folder.
- Open your assigned May Drive folder (bookmarked link from coach).
- Find the HW07_051426 subfolder inside.
- Drop in both videos. Name them:
FirstName_HW07_Jabs.mp4andFirstName_HW07_FTs.mp4 - You’re done. Coach grades by the following Friday.
Tap when you’ve uploaded BOTH videos. Saves to this device.
✓ Completed — great work, athlete
08MJ: Jab Pull-Ups
MJ: Jab Pull-Ups
Jab Pull-Ups
Triple Threat Series
“face away. reverse pivot. small jab, long jab, rip, fire.”
▶ Coach demo · Jab Pull-Ups · Triple Threat Series
Small jab. Long jab. Rip. Shoot.
The small jab is a toe-tap that sells the defender. The long jab is the commit.
Stay LOW the whole series — your chest never rises above triple threat.
📍 Floor setup — L & R Elbow · click to enlarge
The Drill
Start Facing AWAY From the Basket
Position yourself at the LEFT or RIGHT elbow of the FT line. Start facing AWAY from the basket — your back to the rim. This forces the reverse pivot that opens the drill.
Catch on the Jump Stop
Roll the ball to yourself (or catch from a partner if available). Land on a jump stop — both feet hit the ground simultaneously. This sets your pivot foot options open for the next move.
Reverse Pivot → Triple Threat
Execute a reverse pivot to face the basket. Immediately drop into triple threat — ball in the pocket, knees bent, eyes up, ready to shoot/pass/dribble. This is the position every jab is launched from.
Small Jab + Long Jab
From triple threat, perform the small jab (toe tap) — quick, controlled, sells the defender. Reset. Then perform the long jab — bigger commit, more aggressive. Both happen before the rip. Chest stays down, knees stay bent.
Rip + Shoot — Three Heights
After the jab series, rip the ball and shoot. Cycle through the rip heights: LOW rip (under the knees) → shot · MID rip (waist) → shot · HIGH rip (chest) → shot. The rip mechanic is the same from HW06 — hip, through the knees (on low), to the opposite hip.
Stay LOW on the High Rip
The biggest mistake on the HIGH rip is standing up. Your hands rise but your chest, hips, and knees stay where they were on the low rip. Ceiling 1 foot above your head — if you stand up, your head hits it.
Switch Elbows — 10 + 10 Makes
Make 10 from the L Elbow, then move to the R Elbow for 10 more. Two separate videos — one per elbow. Apply the Headlights Rule on every shot: shoulders and hips square as you rise.
What NOT to Do
- Standing up on the high rips — biggest mistake. Hands go up, body stays down.
- Traveling during the jabs — pivot foot stays planted through small AND long jab. If it slides or lifts, that’s a travel.
- Small jab and long jab feel the same — they shouldn’t. Small = toe tap, sells the defender. Long = commit, moves them.
- Skipping the reverse pivot — facing away then pivoting is the whole point. Don’t shortcut by starting already facing the rim.
- Rips become straight lines — every rip is a half-circle through the body, not a swipe across the chest.
Forward + Side Planks
This is the conditioning that holds your jab series clean under fatigue. Forward plank after the LOW rip set. Side plank after the MID rip set. Forward plank after the HIGH rip set. Plus one round after you knock down 10 free throws to close.
Jab Series Fundamentals
🏆 Points BreakdownView
How to Earn 83 points
📤 Submission
✅ Completion
🎯 Accuracy (Coach Graded)
📤 Submit This DrillView
Two Videos. One Folder.
- Open your assigned May Drive folder (bookmarked link from coach).
- Find the HW08_051526 subfolder inside.
- Drop in both videos. Name them:
FirstName_HW08_LElbow.mp4andFirstName_HW08_RElbow.mp4 - You’re done. Coach grades by Sunday.
Tap when you’ve uploaded BOTH videos. Saves to this device.
✓ Completed — great work, athlete
09Kukoc: One-Dribble Jab Pull-Ups
Kukoc: One-Dribble Jab Pull-Ups
One-Dribble
Jab Pull-Ups
“small jab. long jab. rip. one dribble. fire.”
▶ Main demo · One-Dribble Jab Pull-Ups · then HW08 jab recap if needed
Jab. Jab. Rip. ONE dribble. Pull-up.
Exactly one dribble after the rip — not two, not zero. That single dribble is your gather into the pull-up shot.
Stay low through the whole series. The Headlights Rule applies as you rise.
📍 Floor setup — L & R Elbow · click to enlarge
The Drill
Start Facing AWAY From the Basket
Position yourself at the LEFT or RIGHT elbow of the FT line. Start facing AWAY from the basket — back to the rim. Forces the reverse pivot that opens every rep.
Catch on the Jump Stop
Roll the ball to yourself or catch from a partner. Land on a jump stop — both feet hit simultaneously. Either foot becomes your pivot.
Reverse Pivot → Triple Threat
Execute a reverse pivot to face the basket. Drop into triple threat — ball in pocket, knees bent, eyes up, ready for jab/dribble/shoot.
Small Jab + Long Jab
Same jab series as HW08: small jab (toe tap) sells the defender, then long jab commits. Pivot foot stays planted. Chest stays down through both.
Rip + ONE Dribble + Pull-Up Shot
After the jabs, rip the ball (LOW, MID, or HIGH — coach mixes in the demo) and immediately take ONE dribble. That single dribble is your gather. As you collect the ball on the second beat, rise into a pull-up shot. Not two dribbles. Not zero. Exactly one.
Both Hands at Each Elbow
At the LEFT Elbow: make 10 with the LEFT-hand dribble, then 10 with the RIGHT-hand dribble. Move to the RIGHT Elbow: same — 10 left-hand, 10 right-hand. 40 total makes across both elbows and both hands.
Two Videos · One Per Elbow
Film two separate videos — one showing all 20 makes at the LEFT Elbow (both hands), one showing all 20 makes at the RIGHT Elbow (both hands). Apply the Headlights Rule on every shot.
What NOT to Do
- Standing up on the high rips — biggest mistake. Hands rise, body stays low.
- Traveling during the jabs — pivot foot must stay planted through small AND long jab.
- Traveling AFTER the jab — the one dribble has to start BEFORE you lift the pivot. If your foot moves first, that’s a travel and a deduction.
- Two dribbles instead of one — kills the drill. The whole point is the one-dribble gather into the pull-up.
- Catching the ball without rising into the shot — the gather and the shot are one motion, not two.
- Wrong hand dribble — at the L Elbow, both 10-make sets matter (one with each hand). Don’t skip the weak-hand set.
Rear Foot Elevated Split Squat
Same Bulgarian split squat from HW06. Back foot elevated on a bench, chair, or couch. Front foot far enough out that your front knee tracks over (not past) your toes. Lower, drive through your front heel to stand. This builds the single-leg power your pull-up shot rises off of.
▶ Demo · Rear Foot Elevated Split Squat
One-Dribble Pull-Up Fundamentals
🏆 Points BreakdownView
How to Earn 95 points
📤 Submission
✅ Completion
🎯 Accuracy (Coach Graded)
📤 Submit This DrillView
Two Videos. One Folder.
- Open your assigned May Drive folder (bookmarked link from coach).
- Find the HW09_051626 subfolder inside.
- Drop in both videos. Name them:
FirstName_HW09_LElbow.mp4andFirstName_HW09_RElbow.mp4 - You’re done. Coach grades by Monday.
Tap when you’ve uploaded BOTH videos. Saves to this device.
✓ Completed — great work, athlete
10
Beat the Blazers: Relay Race 2
Beat the Blazers: Relay Race 2
HW10 has been canceled. No video submission required. This drill was originally scheduled for Sunday May 17 as a family relay race.
Athletes do NOT lose any points for HW10 — your May totals adjust automatically. The leaderboard standings already account for this.
Next active drill: HW11 on Tuesday May 19 →
11Goggles: Rebound + Put Backs
Goggles: Rebound + Put Backs
Rebound + Put Backs
Two-Part Progression
“throw. grab. elbows up. finish.”
After you rebound, the ball does NOT come down to your waist.
Catch at chest, elbows out and up. The defense steals balls that drop to the waist.
Hands stay high until you launch into the put-back. Every rep.
Part 1 — The Foundation
Throw Ball Against the Backboard
Stand at the middle of the FT line. Throw the basketball against the backboard — not the rim — at an angle that makes it come back toward you. Aim for the upper square. Younger athletes (under 7) work at 6 feet from the hoop.
Jump & Grab the Rebound
As the ball comes off the board, jump and grab it WHILE STILL IN THE AIR. This is the rebound. You’re not waiting for it to come to you — you’re attacking it at its highest point. Two hands on the ball.
Land on TWO Feet — Ball at Chest, Elbows UP
When you come down, land on BOTH feet at the same time. Ball stays at chest or chin level. Elbows out and UP — not down at your sides. This is the rebound stance. Do NOT bring the ball down to your waist.
Put It Back — Lay-Up Off the Backboard
From the rebound stance, go right back up into a lay-up. Always use the backboard for the put-back — never a direct rim shot. LEFT side of the rim → shoot with LEFT hand. RIGHT side → RIGHT hand. Required hand earns the most points.
Make 12 LEFT-Side (Left Hand) + 12 RIGHT-Side (Right Hand)
5a. Make 12 off the LEFT side of the backboard using your LEFT hand.
5b. Make 12 off the RIGHT side of the backboard using your RIGHT hand.
That’s 24 made put-backs to complete Part 1.
Repeat the Cycle
Each rep is a complete cycle — throw, rebound, land, put-back. Reset back to FT line. Repeat. No standing around between reps. Stay in rhythm.
Part 2 — Add the Pump Fake
Everything from Part 1 stays the same. The only change: after you land with the rebound, you pump fake TWICE before going up for the put-back. This sells the shot to a defender, gets them in the air, and creates the open look.
Throw → Rebound → Land
Same as Part 1: throw against the backboard, jump and grab in the air, land on two feet with ball at chest, elbows up. Hands High Rule still applies.
Pump Fake TWICE
From the rebound stance, raise the ball like you’re about to shoot — then bring it back down to chest level. Do this TWICE. Eyes go UP each time, head goes UP each time — like you’re really shooting it. The pump has to be convincing or it’s not a fake.
Then Go Up for the Lay-Up
After the second pump fake, shoot the lay-up off the backboard. Same rules as Part 1 — LEFT side / LEFT hand, RIGHT side / RIGHT hand. The pump fakes don’t change the shot mechanics.
Make 12 LEFT-Side + 12 RIGHT-Side
6a. 12 LEFT-side lay-ups (LEFT hand) WITH pump fake twice.
6b. 12 RIGHT-side lay-ups (RIGHT hand) WITH pump fake twice.
Part 2 complete.
Total: 48 Made Put-Backs
By the time both parts are done, you’ve made 48 total put-back lay-ups. Catch your breath. Hit the S&C. Submit two videos.
What NOT to Do
- Bringing the ball down to your waist after the rebound — the #1 mistake. Defense strips you every time. Ball stays at chest with elbows up.
- Landing on one foot — both feet hit the ground at the same time. One-foot landings are unbalanced and you lose your put-back power.
- Wrong hand for the lay-up — LEFT side requires LEFT hand. RIGHT side requires RIGHT hand. Wrong hand = the rep doesn’t count for full points.
- Pump fakes that don’t sell — in Part 2, if the fake doesn’t show ball movement + eyes up, it’s not a fake. Make it look like you’re really shooting.
- Skipping the backboard on the put-back — every shot uses the board. Even short ones.
Rear Foot Elevated Split Squats
This conditioning builds the legs that hold a controlled two-foot landing under rebound impact. Each leg matters equally — rear elevated forces the front leg to work alone. Sets after each cycle (after Part 1 and after Part 2).
Rebound + Put-Back Fundamentals
🏆 Points BreakdownView
How to Earn 83 points
📤 Submission
✅ Completion — Weak Hand Bonus Available 🔥
🎯 Accuracy (Coach Graded)
📤 Submit This DrillView
Two Videos. One Folder.
- Open your assigned May Drive folder (bookmarked link from coach).
- Find the HW11_051926 subfolder inside.
- Drop in both videos. Name them:
FirstName_HW11_Part1.mp4andFirstName_HW11_Part2.mp4 - You’re done. Coach grades by the end of the week.
Tap when you’ve uploaded BOTH videos. Saves to this device.
✓ Completed — great work, athlete
12Armstrong: Pass Fakes + Retreat Dribbling
Armstrong: Pass Fakes + Retreat Dribbling
Pass Fakes +
Retreat Dribbling
“plant the pivot. sell the fake. don’t travel.”
Your pivot foot is planted. It can lift — but it can NEVER come back down.
If it slides, drags, or re-plants while you hold the ball, that’s a travel.
Every pass fake, every jab, every sweep starts and ends with a legal pivot.
Pivot foot — the established, planted foot. Cannot move, slide, or drag. You may lift it, but you cannot set it back down.
Non-pivot foot — free to step, cross, and rotate around the pivot.
Part 1 — Open Step
One rep = roll out → jump stop → 5 pass fakes. Do 5 reps.
Self-Roll the Ball at the Top of the Key
Roll the basketball forward to yourself from the top of the key. Stay low as you move to it.
Catch on Jump Stop → Triple Threat
Catch on a jump stop (both feet down at once) and immediately drop into triple threat. Your LEFT foot is your pivot for Parts 1 & 2 — it stays planted.
Open Step Right + Pass Fake
Using your LEFT pivot, aggressively step your RIGHT foot out to the right. As you step, throw a pass fake — push the ball forward like you’re passing, but DON’T let it go. Eyes and ball sell it.
Return to Triple Threat — Repeat 4 More Times
Pull back to triple threat and pass fake again. Five pass fakes total in one rep. The left pivot foot must stay legal the entire time — lift it if you must, but never set it back down.
Complete 5 Reps
Reset to the top of the key after each rep. Five complete reps finishes Part 1.
Part 2 — Cross Step
Same as Part 1 — but the step changes. Instead of stepping out, you cross over.
Roll Out → Jump Stop → Triple Threat
Same setup: self-roll, catch on jump stop, drop into triple threat. LEFT foot is still your pivot.
Cross Step + Pass Fake
Using your LEFT pivot, aggressively cross your RIGHT foot over your body to the left. As you cross, throw the pass fake — push the ball without releasing. This is the escape move when a defender cuts off the open step.
Return to Triple Threat — Repeat 4 More Times
Reset and repeat the cross step + pass fake. Five pass fakes per rep. Watch the pivot — crossing over is where most travels happen.
Complete 5 Reps
Five complete reps finishes Part 2 and the base drill. Submit a video of Part 1 and a video of Part 2.
What NOT to Do
- Re-planting the pivot foot — the #1 travel. Once your pivot lifts, it cannot touch the floor again until the ball leaves your hands.
- Pass fakes that don’t sell — a real pass fake moves the ball AND the eyes. A limp wrist flick fools nobody and earns no points.
- Letting the ball go on the fake — it’s a FAKE. The ball never leaves your hands.
Forward Planks + Rear Foot Elevated Split Squats
Two exercises this drill — core stability for the pivot, single-leg strength for the drive. Forward plank holds your posture through the pass-fake series. Rear-elevated split squats build the drive leg for explosive first steps.
▶ Rear Foot Elevated Split Squat · 12 each leg · 2x
Pass Fake + Pivot Fundamentals
🏆 Points Breakdown · Two TiersView
How to Earn 48 points
📤 Submission
✅ Completion
🎯 Accuracy (Coach Graded)
⭐ Want up to +45 more? The MVP Work drill (the gold accordion right below this one) adds a bonus Part 3 sequence. Optional — but it’s the highest-value work on the page.
📤 Submit This DrillView
Two Videos. One Folder.
- Open your assigned May Drive folder (bookmarked link from coach).
- Find the HW12_052126 subfolder inside.
- Drop in both videos. Name them:
FirstName_HW12_Part1.mp4andFirstName_HW12_Part2.mp4 - You’re done. For bonus points, see the gold MVP Work drill below.
Tap when you’ve uploaded your videos. Saves to this device.
✓ Completed — great work, athlete
★MVP Work
MVP Work
Cross Jab → Sweep
→ Crossover → Retreat
“jab. fake. rip low. cross. retreat. reset.”
This is the bonus tier for Armstrong (HW12).
Finish the base drill first — Part 1 and Part 2.
Then chain this full sequence for up to +45 bonus points. Each full sequence = 1 rep. Do 5.
The Extra Credit Chain
This is the hardest sequence on the page. It chains a cross jab, a pass fake, a sweep/rip drive, a crossover, and a retreat dribble into one continuous move.
Roll Out → Jump Stop → Triple Threat
Self-roll, catch on jump stop, drop into triple threat. Your RIGHT foot is the pivot for this sequence.
Cross Jab with the Left Foot
Using your RIGHT pivot, perform a cross jab with your left (non-pivot) foot — jab it across your body. Keep your eyes on the rim the whole time.
Return to Triple Threat → Pass Fake
Pull back to triple threat and throw a pass fake — push the ball forward, eyes selling the pass, no release.
Sweep / Rip to the Left Elbow + Drive
Sweep/rip the ball from your right hip, under your knees, across to your left side — then drive to the left elbow. Low and aggressive. The rip clears the ball past the defender’s hands.
Crossover Dribble at the Elbow (L → R Hand)
Once you reach the left elbow, perform a crossover dribble from your left hand to your right hand. Keep your body between the ball and the basket. The ball should finish in your right hand.
Right-Handed Retreat Dribble Back to the Key
After the crossover, perform a right-handed retreat dribble — backpedal while keeping your dribble alive — all the way back to the top of the key. This is the move that resets a stalled drive.
Complete 5 Reps
Run the full chain five times. Body stays between the ball and the basket the entire sequence. Submit this as your third HW12 video.
What NOT to Do
- Re-planting the pivot foot — the right pivot lifts but never re-plants until the ball leaves your hands.
- Sweeping the ball too high — the rip goes under the knees, not across the chest. High sweeps get stripped.
- Losing the body shield on the crossover — keep your body between the ball and the basket through the whole sequence.
- A lazy retreat dribble — backpedal with control and a live dribble. Don’t pick the ball up.
⭐ Extra Credit ScoringView
How to Earn 45 bonus points
⭐ Part 3 Sequence (Coach Graded)
📤 Submit Extra CreditView
One More Video.
- Finish the HW12 base drill first (Part 1 + Part 2).
- Open the same HW12_052126 subfolder in your May Drive folder.
- Add a third video named
FirstName_HW12_Part3.mp4 - That’s it — up to +45 bonus on top of your HW12 score.
Tap when you’ve uploaded the bonus video. Saves to this device.
✓ Completed — elite work, athlete
13RB1: Footwork Passes
RB1: Footwork Passes
Footwork Passes
Wrap · Figure-8 · Fire
“wrap it. drop low. figure eight. then fire the pass.”
Find a sturdy wall — NOT drywall.
Brick, block, gym wall, or garage door. You’re firing strong passes; drywall will dent or break.
Stand 15 feet back. Every pass goes hard into the wall and comes back to you.
Right-handed? Your weak hand is your LEFT — Parts 2 & 3 use the left hand.
Left-handed? Your weak hand is your RIGHT — flip Parts 2 & 3 to the right hand.
The whole point is building the hand you don’t trust yet.
Part 1 — Two-Handed Chest Pass
Every rep: ball wrap → figure-8 → pass. The footwork comes before the pass, every time.
Start Tall — Ball at Waist
Start in a tall standing position with the basketball at your waist, facing the wall from 15 feet back.
Two Ball Wraps Around the Waist (Clockwise)
Wrap the ball around your waist two times, clockwise. Quick hands, eyes up. The ball stays close to your body — no fumbles.
Drop Low → Figure-8 Around the Knees
Immediately drop into a wide, athletic stance and perform a figure-8 — weave the ball between and around your knees in a figure-8 pattern. Stay low. Don’t lose the ball.
Fire a Two-Handed Chest Pass
Coming out of the figure-8, throw a strong two-handed chest pass into the wall. Step forward into the pass. Push through so your fingers end down and flat. No loop, no arc — a flat, strong pass.
Catch the Rebound, Repeat — 10 Reps
Catch the ball off the wall and reset. Every rep is wrap → figure-8 → pass. Complete 10 reps.
Part 2 — Weak-Hand Chest Pass
Same wrap + figure-8 setup. The pass changes to one hand — your weak hand.
Wrap → Figure-8 (Same as Part 1)
Start tall with the ball at your waist, two clockwise waist wraps, then drop low into the figure-8 around the knees. Identical setup to Part 1.
One-Handed Chest Pass — WEAK Hand
Coming out of the figure-8, fire a one-handed chest pass with your WEAK hand (left hand for right-handers). Push through — fingers finish down and flat. Strong and flat into the wall, no arc.
Step Into It — 10 Reps
Step forward into each pass for power and accuracy. Catch, reset, repeat. Complete 10 reps.
Part 3 — Weak-Hand Bounce Pass
Same setup again. Now the weak-hand pass becomes a bounce pass off the floor into the wall.
Wrap → Figure-8 (Same Setup)
Identical footwork: tall start, two clockwise waist wraps, drop low into the figure-8 around the knees.
One-Handed BOUNCE Pass — WEAK Hand
Coming out of the figure-8, throw a one-handed bounce pass with your WEAK hand. Aim the bounce about two-thirds of the way to the wall so it comes up clean. Push down and through with the weak hand.
Step Into It — 10 Reps
Step forward into each bounce pass. Catch, reset, repeat. Complete 10 reps to finish all three parts — 30 passes total.
What NOT to Do
- Passing into drywall — you’ll dent or break it. Find brick, block, a gym wall, or a garage door.
- Losing the ball during the figure-8 — stay low and wide, keep the ball tight to the weave. Control before speed.
- Arcing the pass — chest and weak-hand passes are flat and strong, not lobs. Drive through with the fingers down.
- Skipping the footwork — every single rep is wrap → figure-8 → pass. No shortcutting straight to the pass.
- Not stepping into the pass — power comes from the step forward, not just the arm.
Rear Foot Elevated Split Squats
Single-leg strength for the athletic stance that powers your passes. Run a set after Part 1, after Part 2, and after Part 3 — keeping the legs honest as you fatigue.
Footwork Passing Fundamentals
🏆 Points BreakdownView
How to Earn 96 points
📤 Submission
✅ Completion
🎯 Accuracy (Coach Graded)
📤 Submit This DrillView
Three Videos. One Folder.
- Open your assigned May Drive folder (bookmarked link from coach).
- Find the HW13_052226 subfolder inside.
- Drop in all three videos. Name them:
FirstName_HW13_Part1.mp4,FirstName_HW13_Part2.mp4,FirstName_HW13_Part3.mp4 - You’re done. Coach grades by the following week.
Tap when you’ve uploaded all three videos. Saves to this device.
✓ Completed — great work, athlete
14Hodges: Catch & Shoot Challenge
Hodges: Catch & Shoot Challenge
Catch & Shoot
Challenge
“catch. shoot. stay composed — even on the misses.”
You WILL miss shots. That’s expected. What’s graded is how you handle it.
Show poise and confidence after a miss → up to +15 points.
Show frustration, anger, or bad body language → 20 points SUBTRACTED.
The best shooters miss and reset like nothing happened. Be that.
How the Challenge Works
Set a 3-minute timer. Go until it buzzes. Record the whole thing.
Start Under the Hoop, One Ball
You need one basketball and a running 3-minute clock. Start standing under the hoop.
Self-Roll the Ball Out, Catch Inside the Arc
Roll the ball out away from the hoop and chase it. Catch it within the 3-point line — mid-range. Do NOT shoot high-school threes; everything stays inside the arc.
Use Your Footwork Into the Catch
As you catch, use real footwork — left-right step-to curl, right-left step-to curl, or a hop-to. Mix them. The grader is watching for all three across the 3 minutes.
Turn & Shoot — With Arc
Square up, turn, and shoot with a real arc — not a flat line drive. Hold your follow-through until the ball hits net or rim.
Rebound, Reset, Repeat Until the Buzzer
Get your own rebound, roll out again, and keep going for the full 3 minutes. Count your makes. Miss? Reset with composure and go again. No pouting — it costs you.
10+ makes → 25 pts · 6–9 makes → 20 pts · 3–5 makes → 15 pts · Under 2 makes → 10 pts
Good footwork and quick resets get you more attempts — which means more makes.
What NOT to Do
- Bad body language after a miss — frustration, anger, slumped shoulders, head shakes. This is an automatic −20 points. The drill is built to test exactly this.
- Shooting high-school 3s — everything stays inside the arc. Range threes don’t count and cost you the +5.
- Flat shots with no arc — shoot up, not out. Hold the follow-through.
- Skipping the footwork — catching flat-footed wastes the rep. Use the curls and the hop-to.
- Rushing so hard you spray shots — quick resets are good, but balance speed with a real shooting motion.
None for This Drill
This is a short, focused 3-minute challenge — no strength & conditioning attached. Just bring your shot and your composure.
Catch & Shoot Fundamentals
🏆 Points BreakdownView
How to Earn 95 points
📤 Submission & Completion
🎯 Score — Makes in 3 Minutes (one tier)
🎯 Accuracy (Coach Graded)
⛔ Penalty
📤 Submit This DrillView
One Video. The Whole 3 Minutes.
- Record the entire 3-minute challenge in one continuous video — no cuts.
- Open your assigned May Drive folder (bookmarked link from coach).
- Find the HW14_052326 subfolder inside.
- Drop in the video. Name it:
FirstName_HW14_Challenge.mp4 - You’re done. Composure counts — coach is watching the whole clip.
Tap when you’ve uploaded your challenge video. Saves to this device.
✓ Completed — great work, athlete
15
Beat the Suns: Relay Race 3
Beat the Suns: Relay Race 3
★ Final family drill — championship week. Parent + athlete on the floor together. Unlocks Sunday May 24.